
The resolution of photos for the Web is completely different to that of print, and it only takes a few steps to sort it out should you want to make your images print friendly for book submission or similar. The biggest problem is the preparation of the image and knowing what resolution is all about.
Most people have fairly standard digital cameras, and the file size setting that you have on your camera dictates how many pixels that image will have. The pixels are like tiny little digital dots of colour and the more pixels there are, the better quality the image.
Now – the standard resolution on digital cameras is 72PPI (pixels per inch), and this resolution is the standard for the Web, too. For print, though, the optimum is 300PPI, which is quite some jump! Resizing is pretty straight forward, so long as the pixel size or quality of photo/file size is set as high as possible on your camera – this gives us many more pixels to play with!
The resolution will read the number of pixels and determine the physical size of the image. If it is 1400 pixels wide at 72PPI that will be a pretty big image (nearly 50 centimetres), yet at 300PPI it will be much smaller (more like 12 centimetres). Rescaling doesn't change the amount of pixels, only the physical size. It's a bit like knitting gauge... 30 stitches knit in bulky yarn will be pretty different from 30 stitches knit in sock yarn, yet there will still be the same amount of stitches. Make sense? Pixels are like stitches, resolution is like gauge. Want lots of detail in your sweater? Use a finer yarn, with more stitches per inch.
Many of you, I'm sure, have found that when you download the images off your camera, those photos look pretty huge on your screen due to that 72PPI. Changing the image resolution to 300PPI is pretty simple, and that's what I'm going to show you here today.
If you ever feel tempted to reduce the file size/image quality on your camera (that is, standard, fine, superfine, et cetera) please don't make the files smaller just to get more photos on your memory card. It may seem like a good idea at the time, but those photos will be really small and grainy and you won't be able to do much with them. It's a much better idea to buy a spare memory card. Go for the highest quality file setting your camera will let you choose; you never know when you'll need those photos for something other than emailing to your friends or sharing on Flickr.
A huge no-no is upscaling small images to large ones – this causes pixelation and makes the images pretty useless. If the photos you've got aren't a big file with loads of pixels, this tutorial won't be much use to you, I'm afraid.
How to do it in Photoshop
This first example is done in Photoshop 7 on a PC.
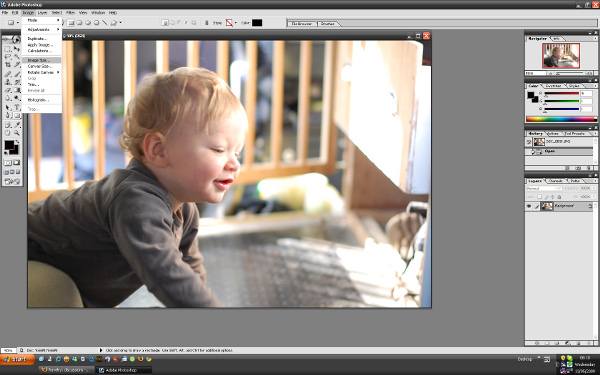
Open up the image file, and you'll see the Image section in the menu. Click on that to bring up the drop-down menu, and scroll down to 'Image Size'. This is the option we need to open to change the resolution.
When you click on the 'Image Size' option it will bring up a little box like this:
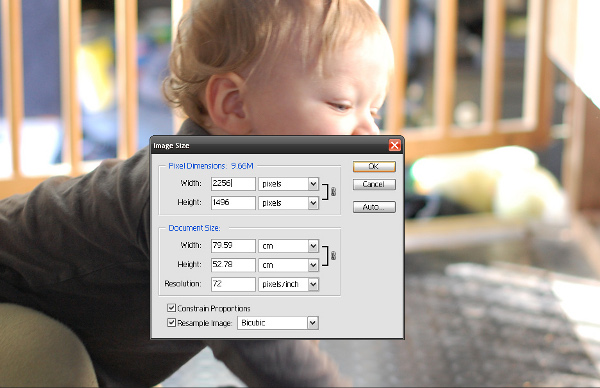
and you can see that the resolution is set to 72PPI. All you need to do is to edit that number to 300 – don't change anything else, though! Whatever you do, don't let the number of pixels change – that can have disastrous effects. Photoshop may change the number of pixels, so you may need to re-input the original number the image had (best to make a note of it!). There probably is a shortcut to tell Photoshop to adjust the image and not the pixels, but it's been a while since I used it, so if someone wants to comment about that, please do!
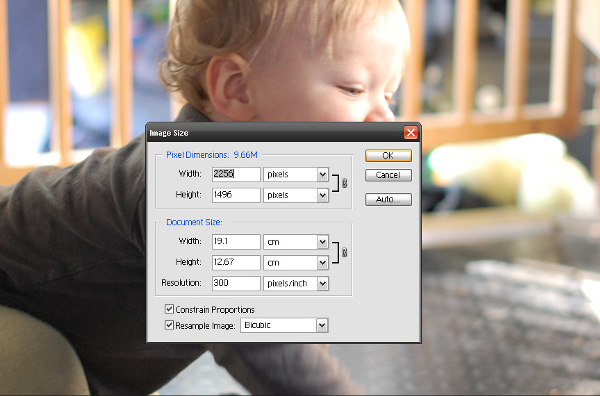
You can see here the higher resolution with the same number of pixels, and the image size is much smaller – which is what should happen.
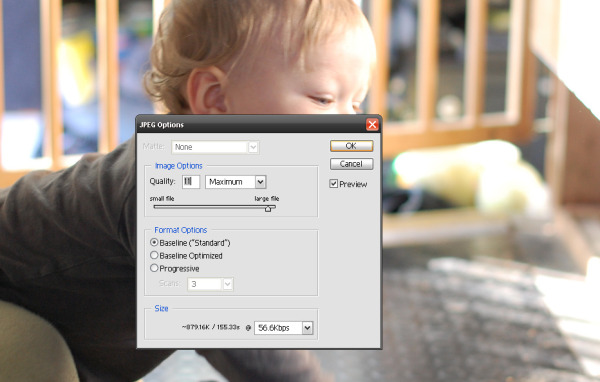
When you come to save your file, save it at a high quality. Photoshop works in numbers to represent compression, and anything over 10 is ideal. When I used to use Photoshop I always went for 11, but 10 is generally good enough.
Jpegs are a funny sort of file, and that compression ratio makes a big difference to the quality. For print, high-quality images (that is, virtually no compression) are a must. The Web won't mind if you want to share low rate jpegs, but print will.
And that's about it for Photoshop.
How to do it in Gimp
I use Gimp for editing images. It's Open Source software and is free. It works on any operating system and is comparable to Photoshop. I'm using Gimp on Linux (Ubuntu) but it'll be pretty much the same on any operating system.
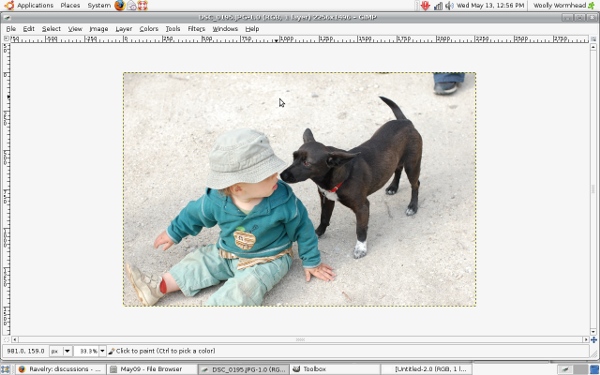
Open up your photo and again look for the 'Image' option in the menu. Click on 'Image' and open up the drop-down menu; scroll down to 'Scale Image'. This will open a box like this:
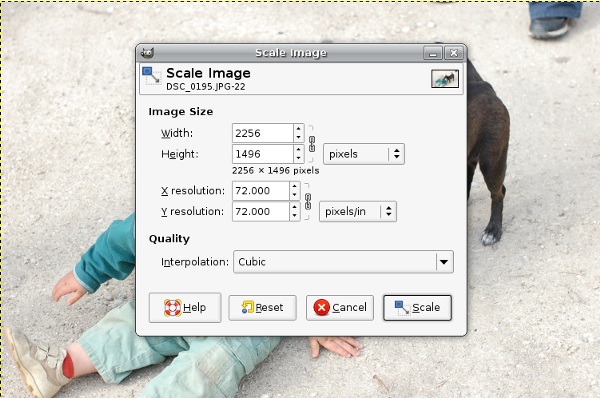
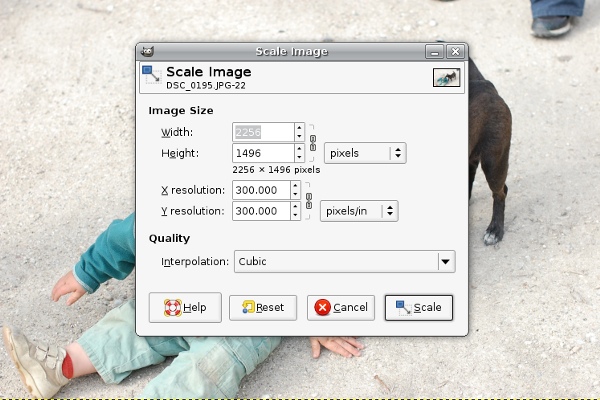
Here you'll see that there are two boxes for the resolution. Provided you don't click on that little chain link to the right of the boxes, you only need to edit one of the numbers, as it will automatically change both of them.
Gimp is more straight forward than Photoshop, because it won't try and change the number of pixels – it already knows you want them to stay the same and will automatically adjust the image size, which is perfect.
When you come to save the image, Gimp works on a percentage system, so anything about 90% is going to guarantee your image stays high-quality.
And there you have the process for Gimp!
Other editing software
If you have PaintShop Pro, it will work in very much the same way, and the option will be found under the Image menu. I haven't used PaintShop Pro since I was teaching (oh, how long ago now!) and can't remember what the option was called, but it's likely the same as Photoshop.
Picassa is popular image editing software. I have it here on Linux, but it isn't sophisticated enough to allow you to change the resolution. It will upscale the number of pixels for you, but as we've discussed, this isn't a good idea, as it can make the image funny. Picassa is specifically designed for Web images, so it has a predefined resolution of 72PPI and I haven't yet found a way to change that.
Photoshop is expensive software, so I don't recommend anyone buying it for this purpose! However, if you want something free that is sophisticated enough to do this and much, much more, do try Gimp. As someone who seems to spend an awful lot of time editing images for the Web and print, Gimp meets all of my needs!
To recap (if you're still reading!)
The key to getting this right is to not alter the number of pixels. The pixels are the all-important bits in your photo, so make sure you keep them just as they are! To rescale from a 72PPI to 300PPI, we want the physical size of the photo to change, so that all the pixels are still there but in a smaller, more suitable for print, space :)
Messing with your pixels, trying to upsize a small image is bad news. These don't work in print. Trust me, I tried once and never again. Take your images in large files with loads and loads of pixels and then you'll have something that might be suitable for print.
This post was edited on 2/2/2022 to add the title image. The title image features my boy Aran in the Aurora beret from Bambeanies.


