
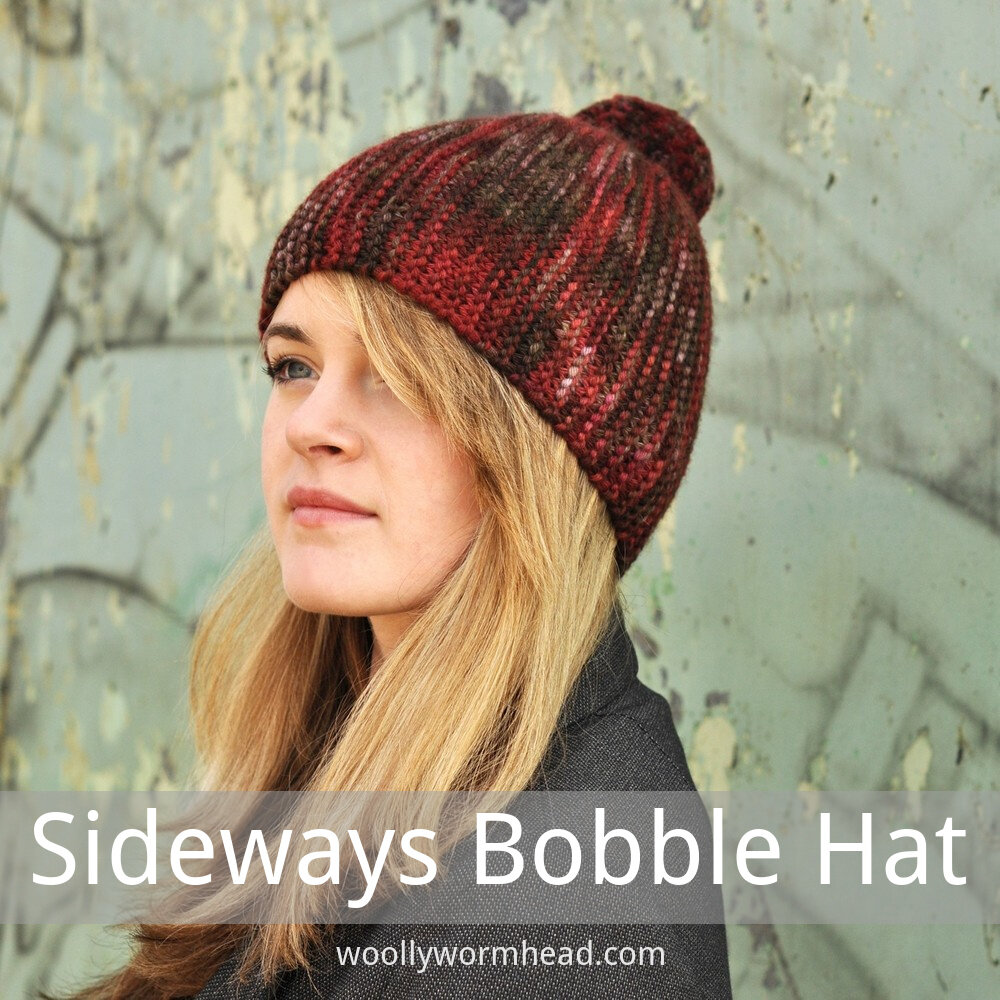
Description
Sideways Bobble is a sideways knit beanie. It is worked in garter stitch all over and has a fitted crown that is shaped by short rows.
Availability
My Patreon supporters and members of The Woolly Hat Society get exclusive early access to new free patterns and tutorials. Once the exclusive period is over it’s published here on the blog.
Support
If you have a question about this pattern, pop it in a comment below. Sorry, but I’m unable to help with my free patterns or tutorials via email or private messages.
Social Media
Share your hand-knit Hats online with these hashtags!
#WWSidewaysBobbleHat
Yarn
138yd/126m/100g
Chunky weight, single or multi-ply yarn.
Needles & Notions
Pair 5mm/UK6/US8 straight needles or size needed to obtain gauge
Stitch markers as necessary
Tapestry needle
Approx 3yd/3m waste yarn (provisional cast-on)
5mm crochet hook (provisional cast-on)
Scraps of co-ordinating yarn for pompom
Sample details
Shown in Manos del Uruguay Clasica [138yd/126m per 100g; 100% Wool]
Shown in size 22in/56cm on model with 21.5in/54.5cm circumference head
Gauge
16 sts x 20 rows to 4in/10cm on 5mm needles over St.St.
Sizes
To fit sizes: 19 [21, 23] in/48 [55, 58.5] cm
Finished size: 18 [20, 21] in/45 [51, 53] cm
Not sure which size to make? Check my handy size and measuring guide!
Skills required
Garter Stitch
Kitchener Stitch for Garter Stitch
Pompoms
Notes
Fit is determined by row gauge and the Hat is knit side to side, constructed from consecutive panels.
Support
If you have a question about this pattern, pop it in a comment below. Sorry, but I’m unable to help with my free patterns or tutorials via email or private messages.
Social Media
Share your Hats online with these hashtags!
#WWSidewaysBobbleHat
Abbreviations
K: knit
st(s): stitch(es)
SR: perform a short row
How to
If you intend sewing the seam, cast on with main yarn. If you intend grafting the seam, cast on with scrap yarn and change to main for row 1.
Cast on 33 [34, 35] sts
Panel
Row 1: Knit all sts
Row 2: K32 [33, 34], SR
Row 3: Knit to end
Row 4: K31 [32, 33], SR
Row 5: Knit to end
Row 6: K30 [31, 32], SR
Row 7: Knit to end
Row 8: K29 [30, 31], SR
Row 9: Knit to end
Row 10: K28 [29, 30], SR
Row 11: Knit to end
Continue in this manner until there are 7 [9, 11] short rowed stitches on right hand needle, ending at the brim edge after a plain knit row.
Next row: Knit across all sts working the short rows as you go [33, 34, 35] sts
You have just knitted one panel. Start again from Row 1 and repeat for a further 5 times, 6 panels in total.
If you intend to graft the Hat then you’ll want to omit the final plain knit on the final panel - this will be replaced by the graft.
Finishing
Either sew up the seam neatly with matching yarn, or use one of the invisible grafting methods such as kitchener stitch or 3-needle bind off. Remove the waste cast on yarn and replace live stitches back onto working needle.
Pompom
Of course this is optional, but don't they finish this Hat? A pompom maker with a 2” circumference is recommended. Using various coordinating yarns in different gauges, the pompom will be really tight before finishing.
Leave a long enough tail after securing the centre to be able to sew to the crown. If you are going to leave the crown plain, use some left over yarn from the main Hat to thread through the tiny circle at the crown – gently tighten and secure to finish.
Weave in all ends & sew on pompom securely. Blocking isn't necessary.


