

This tutorial demonstrates how to join two pieces of knitting together using live stitches. A situation where you might use this technique is when making a folded picot brim, like my Tebe Slouch pattern, where a provisional cast-on is used, and once the waste yarn is removed there are two sets of stitches that need to become one.

1) With live stitches ready, both sets of needles should be parallel. In most cases you will be bringing the wrong sides together, but occasionally it may be different – your pattern will tell you which sides should be facing.
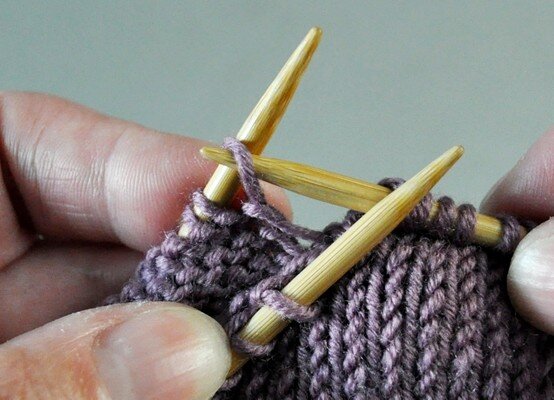
2) Insert the right hand needle, where the joined stitches will be placed, into the first stitch on the back needle.

3) Transfer this stitch to the front needle, keeping the stitch orientation the same (that is, try not to twist it).

4) Simply knit this transferred stitch together with the first stitch on the front needle. Some patterns may instruct you to purl them together, in which case everything would be the same, except they would be purled together instead of knitted.
Continue in this manner until all of the stitches have been joined!
Support
As always, if you have a question about this technique or need some help with it, leave a comment below! I’m afraid I’m unable to offer help via email or private message, but you’re welcome to post in our forums.


