Description
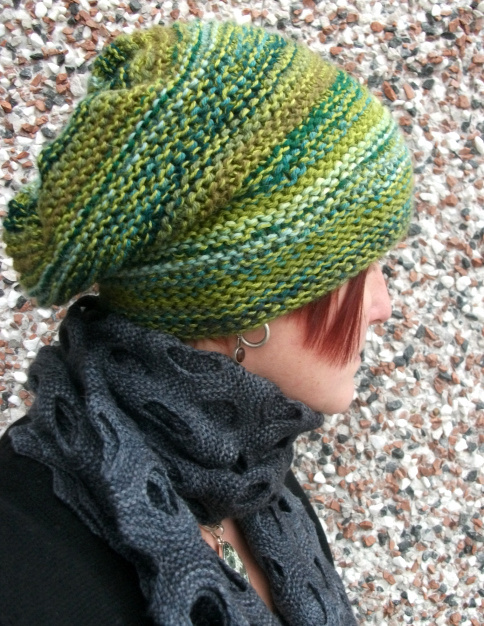
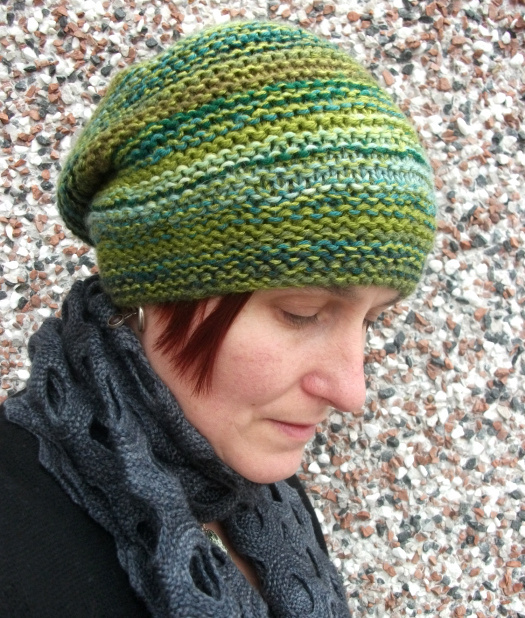
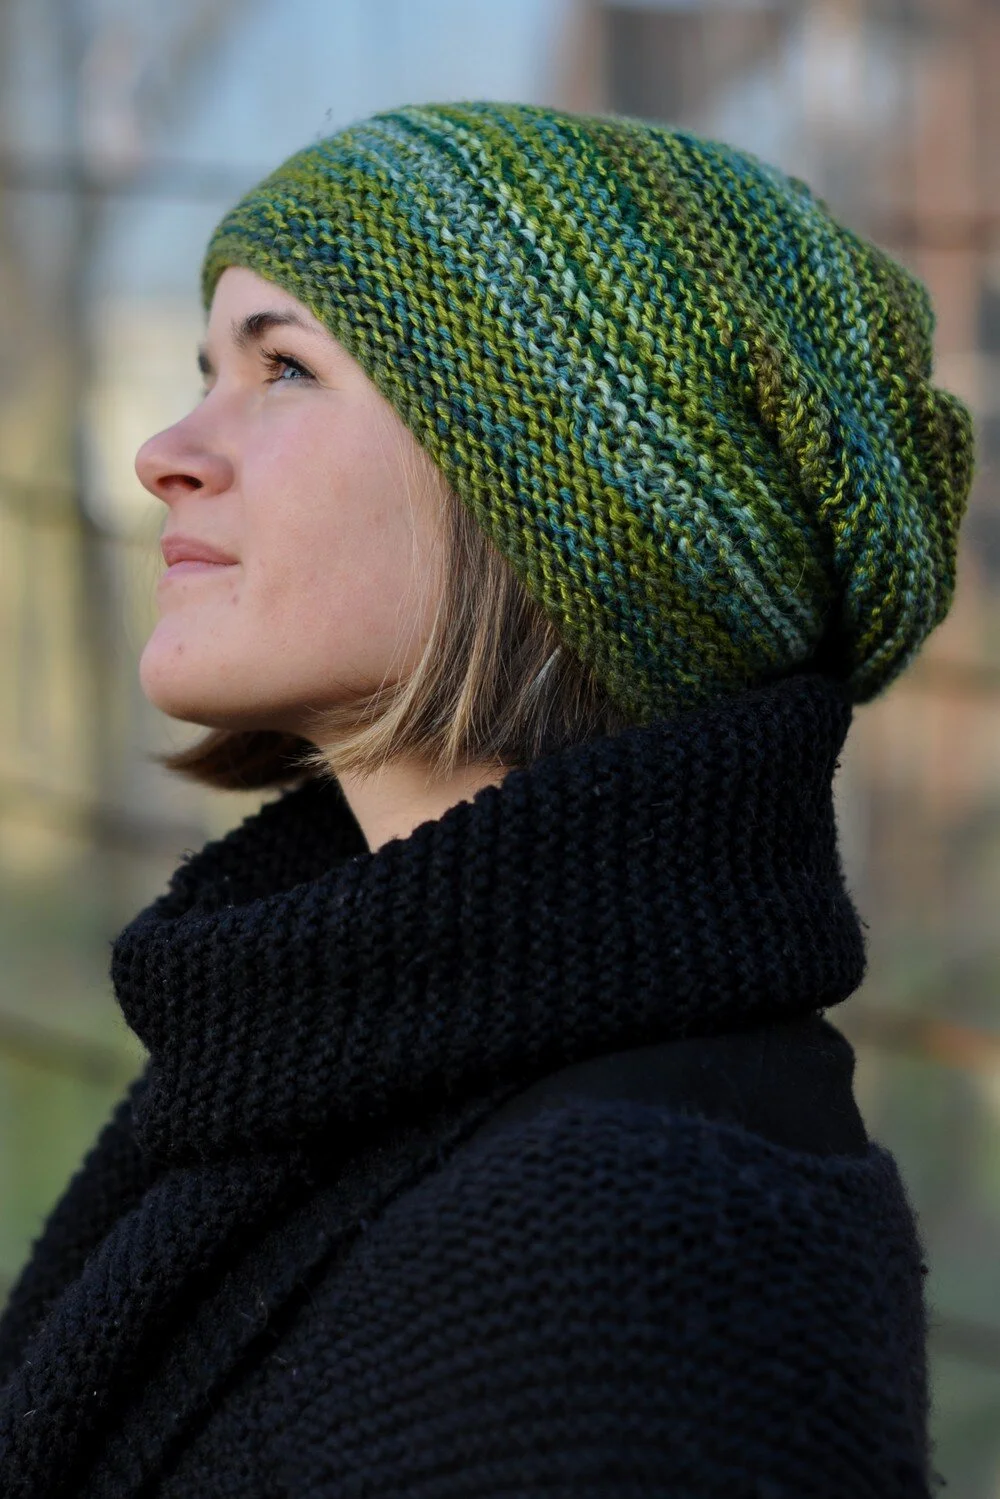
Sarah's Slouch is a slouchy garter stitch Hat. It's worked in the round and starts with a fitted brim. The body is slightly wider than the brim, and slightly longer than a regular beanie. It has a gathered crown.
Availability
My Patreon supporters and members of The Woolly Hat Society get exclusive early access to new free patterns and tutorials. Once the exclusive period is over it’s published here on the blog.
Support
If you have a question about this pattern, pop it in a comment below. Sorry, but I’m unable to help with my free patterns or tutorials via email or private messages.
Social Media
Share your hand-knit Hats online with these hashtags!
#WWSarahsSlouch
Yarn
Yarn A: 22 [32, 42, 53] g/95 [137, 184, 232] yd/87 [125, 168, 212] m
Yarn B: 22 [32, 42, 53] g/95 [137, 184, 232] yd/87 [125, 168, 212] m
Assorted 4ply and DK/sports weight yarns – Hat is knitted with both yarns held together throughout
Needles & Notions
Set 4.5mm/UK7/US7 & 5.5mm/UK5/US9 DPNs/Circular or size needed to obtain gauge
Stitch marker as necessary
Tapestry needle
Sample details
BabyLongLegs Semi~Precious 4ply [437yd/400m per 100g; 50% Merino, 50% Silk] & assorted DK/Sports weight oddments
Shown in size 23in/58.5cm on model with 22in/55.25cm circumference head
Gauge
18 sts x 36 rows to 4in/10cm on 4.5mm needles over Garter.St
16 sts x 32 rows to 4in/10cm on 5.5mm needles over Garter.St
Sizes
To fit sizes: 14 [17, 20, 23] in/ 35.5 [43.25, 51, 58.5] cm
Finished size: 11 [13.25, 15.5, 17.75] in/ 28 [33.75, 40, 45] cm
Not sure which size to make? Check my handy size and measuring guide!
Skills required
Garter Stitch
Knitting in the round
Abbreviations
K: knit
P: purl
rpt: repeat
st(s): stitch(es)
M1: pick up the horizontal loop before the next stitch, place it onto the left needle and knit into the back of it
SSP: slip next 2 sts knitwise, then purl these 2 sts together through the backs of the loops
p2tog: purl next 2sts together
How to
Using 2 strands of yarn held together as indicated above, and with 4.5mm needles, and using a suitable cast-on method (I find a cable cast-on ideal for garter stitch edges), cast on 50 [60, 70, 80] sts
Join in the round, being careful not to twist sts.
Place stitch marker to indicate start of round.
Brim
Rnd 1: Purl all sts
Rnd 2: Knit all sts
These 2 rounds create Garter Stitch in the round. Repeat these 2 rounds until Brim measures 1 [1.25, 1.5, 1.75] in/ 2.5 [3.25, 3.75, 4.5] cm (or desired length) ending after a Rnd 1 then work increase round once as follows:
Inc rnd: K5, M1; rpt from * to end [60, 72, 84, 96 sts]
Change to 5.5mm needles.
Body
Continue working Garter Stitch as given for the Brim until work measures 4 [4.75, 5.5, 6] in/ 10.25 [12, 14, 15.25] cm from the start of the Body section (or desired length) ending after a Rnd 2
Crown
Rnd 1: *P2tog, ssp; rpt from * to end [30, 36, 42, 48 sts]
Rnd 2: Knit all sts
Rnd 3: *P2tog, ssp; rpt from * to end [15, 18, 21, 24 sts]
Rnd 4: Knit all sts
Rnd 5: P 1 [0, 1, 0] *P2tog, ssp; rpt from * to end [8, 9, 11, 12 sts]
Rnd 6: Knit all sts
Break yarn and draw through remaining 8 [9, 11, 12] stitches, tighten to close.
Finishing
Weave in all ends. Whilst blocking would be recommended, garter stitch is incredibly stretchy and the body of the Hat will grow sufficiently with wear – excessive blocking will likely cause your Hat to become too big.


A very good friend of mine had a birthday recently, a special birthday. And knowing just how much she loves Hats, I decided to make one just for her. But I didn't just knit her a Hat, I designed with her in mind, in a style I thought she'd suit, and in colours that would cheer the dullest of days. And then I wrote the pattern for her Hat.
You know my friend as BabyLongLegs.
So, I said to BBL, "your Hat, your call - what should I do with it?" And so it's been published as a free pattern, which we both felt was the right way to go.
Doesn't it suit her? I love these photos she sent me... although they're a tad coy, the whole composition looks cosy and comfortable and right. BabyLongLegs is rockin' that Hat, I'd say. And I'm reliably told it's her Happy Hat :)
Before I sent it off, I grabbed a couple of photos of Alyx wearing the Hat... (it's a habit to get photos of Hats before they get sent anywhere in case they go amiss) and I had a bit of a job trying to get this Hat of Alyx's head, as she too was rather taken with it...
Two yarns are knitted together to create this effect - the base yarn was Semi~Precious 4ply (BabyLongLegs own yarn!) which is constant all the way through. It provides stability, in the colours and in drape, with it's 50/50 silk & merino blend. For the 2nd yarn I used a number of different DK/light worsted yarns, and used as many BabyLongLegs oddments as my stash would permit.
I liked the idea that the same yarns that had been hand dyed by my friend, then used in my patterns, would make their way into her present. Like they had a story to tell all of their own.
The pattern does include notes about the use of yarns, with links to any relevant tutorials. Use wool for the 2nd yarn, so they can spit splice nicely together to create continuity between the colours. It's how the yarns and colours are used that make this Hat special - each combination is entirely unique. You could use a single yarn that gives the same gauge if you prefer, though I do think it creates a deeper effect with the yarns held together. Why not try 3 fine yarns for really deep colour?
It makes me happy to see something I've made enjoyed, to see my friends happy too.
There's a few sizes included in the pattern, something for everyone, and we hope you enjoy it too!