
This is a method I’ve taken to using rather a lot with modular designs, especially those that have a bit of sideways Garter Stitch in them.
The Slipped Stitch Selvedge gives a really nice edge to Garter Stitch and creates a distinct and lovely border when the stitches are picked up from the reverse. If you find your selvedge is a little on the loose side then this deals with that, too.

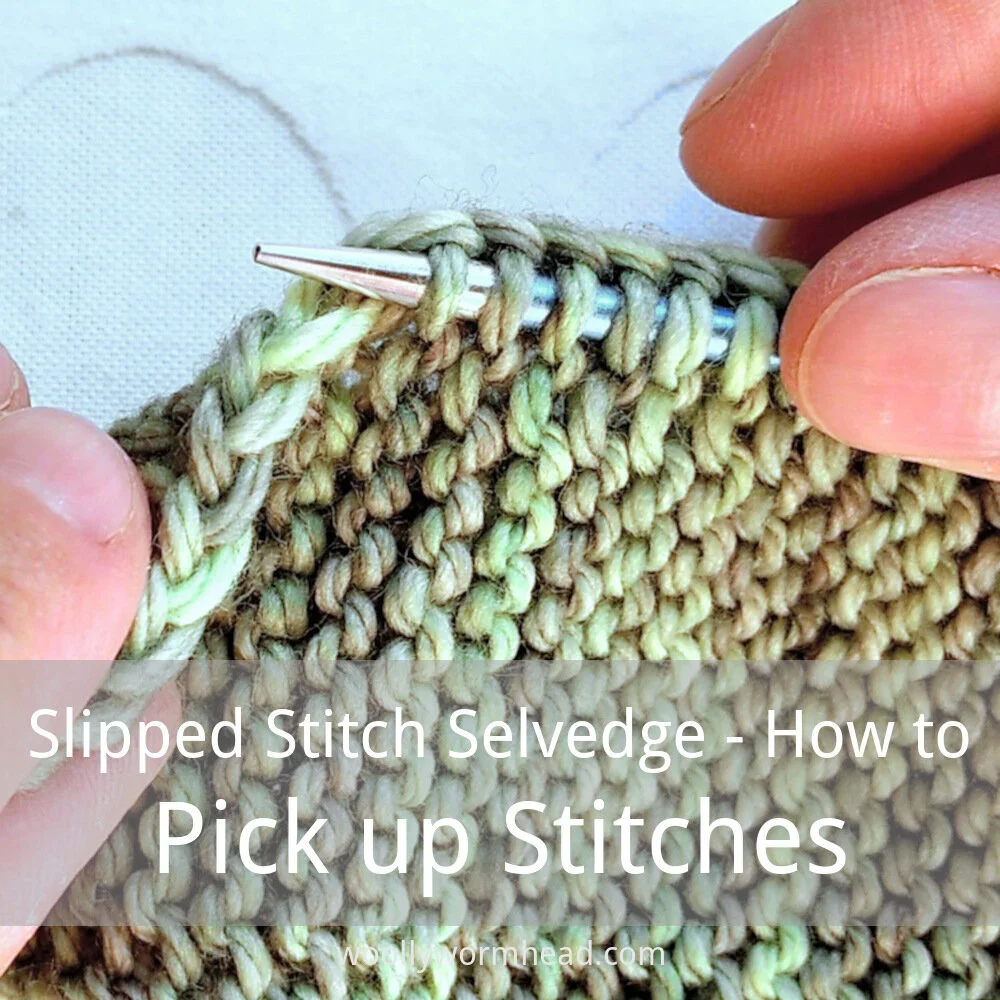
1) On the reverse of the selvedge you’ll be wanting to pick up the vertical loop that sits closest to the chain. It is part of the V chain that sits along the edge.

2) Insert the needle tip behind the loop

3) And slide it onto the needle. Make sure the yarn doesn’t split, and don’t wiggle the needle too much else it’ll affect the tension of the chain.

4) Continue until all of the stitches have been picked up. If the strip of Garter Stitch has been grafted be mindful to not miss any stitches at the graft point.

5) and this is how the chain and picked up stitches look from the right side.
When you’ve picked up all of the stitches, flip your work back over so the right side is facing, then rejoin your yarn and knit as instructed.
I don’t pick up and knit for this method, I only pick up, and that’s because we’re working from the wrong side. You can pick up knit but do bear in mind that it’ll leave a ridge on the right side, and that might not be the effect you’re after. I’ve generally found it neatest to join the yarn after the stitches have been picked up and knit the first row or round - it leaves a little breathing room between the chain and the body of the knitting.
The technique shown in this tutorial is really simple and very effective. I've used this method a few times in my patterns - most recently in my new Campello design and previously in my Swinton and Hadleigh designs in Painted Woolly Toppers for Kids. It creates a wonderful edge along which to rejoin work for multi-directional knitting, and has plenty of uses beyond Hat brims!
Support
As always, if you have a question about this technique or need some help with it, leave a comment below! I’m afraid I’m unable to offer help via email or private message but you’re welcome to post in our forums.
The photos in this post were updated on 30/1/2021.


