

I’ve honestly no idea if this is an official name for this technique, or even if this method is a proper technique but I’ve used it rather a lot and thought it deserved a tutorial and a name!
This method is used in my Mulinello, Shuttered and Ponderosa patterns, to name but a few. I kinda got into it for a while as it was a way to achieve a really distinct detail without having to learn a whole bunch of new techniques. I like things like that, details that can be created simply from techniques we’re already familiar with by mixing them and using them in ways we hadn’t thought of before.
Of course if you’re not keen on casting off then picking up stitches you can substitute the Lateral Braid in a single colour! But you might want to give this a go anyway.
Part One - Binding Off

1) You’re going to start by casting off all of your stitches using the Standard Bind-off method. Because you’re going to be picking them up again you’ll want to use a much larger needle. When folks have tried this in my workshops they’ve been hesitant, as the bind-off looks really loose, but it wants too - the next step will use up all of that slack.

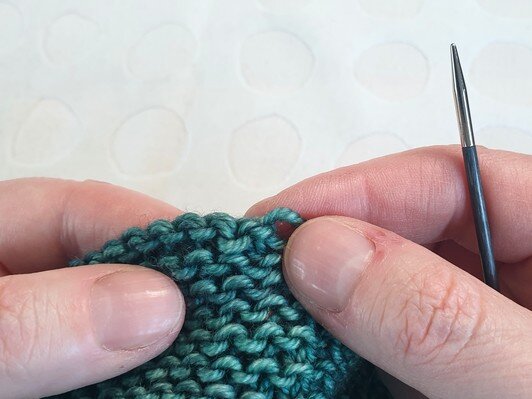
2) When you get to the last stitch, if you generally pull the loop up and out for a neater finish, which is what I normally do, I suggest you don’t here - doing this kinda removes the structure of the last stitch because, well, you’re removing it. And if you want to pick up the right number of stitches and have a neater join, you’re better off leaving it there.
Instead, pull the yarn tail through the last stitch loop to close.
A few folks have asked whether they need to break the yarn to pull through if they’re going to knit the picked up stitches afterwards and the answer is - well, yes…. we need that yarn tail to tidy up the join. And by keeping the yarn attached. it kinda messes up the tension once you start to knit again. If I find a neater solution to this that doesn’t require breaking the yarn then I’ll get it photographed and update this post!
Part Two - Picking up Stitches
3) Now we want to flip our work over to the back of the chain and pick up the stitches. We’ll be picking up the loop that sits right under that double stitch bind-off edge. For this I suggest you use a much finer needle than the ones you’ve been using for the rest of the project. It allows you to get the needle tip in comfortably without the stitches getting tight on the needle.

4) Insert the needle tip into the loop from bottom to top.

5) Do the same in every consecutive loop - you’re aiming to pick up as many stitches as you cast off.

6) Once you’re into a good rhythm the stitches will look pretty even. Don’t worry about their orientation at this point, you’ll get a chance to rectify that later. It’s better to focus on picking them all up and not splitting the yarn in this step.
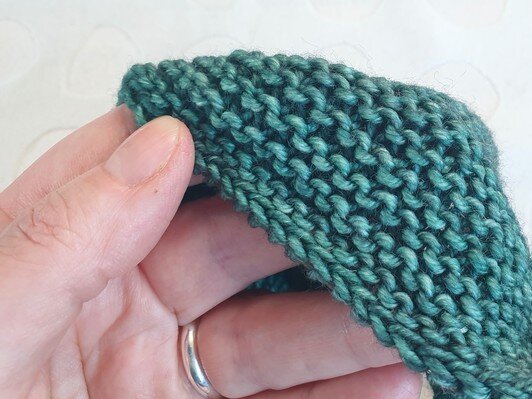
7) This is what it’ll look like from the right side of your work as you’re getting the stitches onto the needle.

8) Once you’ve picked up all the loops, count your stitches to make sure they match the number you cast-off. Don’t worry if the join doesn’t look too neat, you’ll be able to use the yarn tail to neaten things up and duplicate stitch over the join.

9) With your working needle, rejoin the yarn and start to knit the stitches. This is the time to re-orientate those stitches if they weren’t quite sitting right after being picked up. I’m knitting into the backs of the loops so that they don’t appear twisted after the bind-off braid. If the stitches remain twisted they’ll make the braider a little tighter, which isn’t ideal, especially if it’s being used on something that needs a little bit of stretch like a Hat.

10) And this is how they’ll look once they’ve been knitted!
Part Three - Finishing the Chain
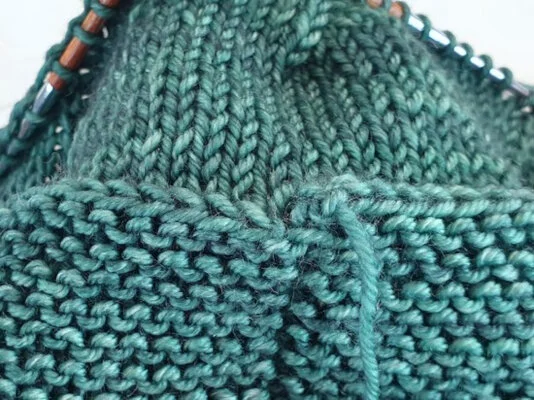
11) Once you’ve knitted a section after picking up from the chain, you’ll be ready to complete the chain and neaten the finish. We do this by mimicking a cast-off stitch across the join.

12) Thread the cast-off tail onto a blunt needle and insert it behind both legs of the first cast off stitch, from top to bottom.

13) Pull the yarn all the way through and you’ll see how it’s connecting the last stitch to the very first, by continuing the chain link.

14) From there you’ll want to insert the needle back into the centre of the last chain, into the same place the cast-off tail comes from. Be careful here to send the needle downwards, so that it goes fully into the chain.

15) Weave in all ends then it’s ready for blocking! The tension may not even up fully until it’s had a good soak but if you ensure you don’t cut the tail too short after weaving in the ends, you can always do it again or duplicate stitch over it if it isn’t quite neat enough.
Support
If you’ve a question about this technique, pop it in a comment below or visit the forum! I’m unable to offer help with patterns or techniques via email.


