
Good morning!
So here's the tutorial for making the felted circles that have kept my hands busy of late. I won't be publishing it as a pattern, and I ask that folks don't add it to Ravelry or any other pattern database. I will publish it on the blog at a later date, though. It's a guide rather than a specific set of instructions, a tutorial that explains my thinking and the maths behind them, and how they turned out for me.
If you've never made a sideways garter stitch circle before then this is a really good place to start - felting hides an awful lot and these circles can have a lot of uses.
Let's start with the theory!

Why 19 is the magic number
If you've followed along with any of my sideways Hat classes - whether they be in-person classes, the Get Garter eBook or any of the Turning Sideways online classes - you'll have heard me talk about 6 being the magic number when it comes to sideways garter stitch circles. Because sideways Hats made this way, as a series of consecutive panels, will start with maths of a circle for the crown shaping. Even if you go off and explore other shapes, knowing that it all started with the humble circle helps make this whole construction method clearer.
Having explained about the number 6, how a 6 panel sideways Hat will have every stitch short-rowed at the crown, I then explain about a 12 panel sideways Hat, where every other stitch is short rowed in the crown shaping. That theory can be taken further, and that's what we do with these. It isn't something I recommend for Hats as the centre can get pretty bulky with all those extra panels and opening/closing rows, not to mention juggling the maths and multiples of 18 or more is mighty restrictive. But for these circles, that are chucked in the washing machine for felting, and where finished size doesn't need to be accurate, it's totally fine.
So, an 18 panel sideways Hat will have every 3rd stitch short rowed in the crown section. Or, an 18 panel circle will have every 3rd stitch short rowed from the centre to the perimeter. Except that 18 doesn't quite cut it. And here's why!
We'll remember from the 6 panel sideways circle maths that we round down from 6.28 to 6, because garter stitch is stretchy and knitting can't do decimal places. We get 6.28 from 2 x pi x the radius, or 6.28 x the radius. That 6.28 is closer to 6 and a third than just 6. So when we multiply the number of panels by 3 we shouldn't forget that extra 3rd. For a Hat made this way we can ignore it if we want to and stick with 18 panels, as the crown being very close to a flat circle will be good enough. Yet if we want to make a flat circle, especially one that's going to be felted and will face enough challenges in maintaining it's shape, being mindful of that extra 0.28 is a good idea in my opinion.
If we multiply 6.28 x 3 we get 18.84. That's pretty close to 19. So I ran with 19.
If you're wondering whether we should factor that 0.28 in a 12 panel circle then I'd say maybe, but for a 12 panel Hat then I'd say no. 6.28 x 2 = 12.56 and rounding either way makes little difference. Except that 12 is an awful lot easier to deal with than 13 if you're wanting to grade that Hat or otherwise deal with knitting maths. Essentially, ignore that 0.28 unless you're going with 18 panels or more.
I digress.
You'll want to aim for 19 panels but if you run out of yarn, 18 will do. I made each of my circles with 19 panels and they each came out fantastically (and I'm a circle perfectionist).
And why not 6 panels, you may be asking? You can totally make a circle with 6 panels! Except it'll be more of a hexagon, especially if you use a plied or firmer yarn. The more panels you have, the more you divide the circumference and the smaller each arc will be, and thus closer to a true circle. Go with 25 panels if you wanna try, and short row every 4th stitch.

Choosing yarn
I used up chunky yarn weight oddments in pure wool that I knew would felt. The 2 shown were single ply yarns, namely Manos Wool Classica, Debbie Bliss Maya and a few others of very similar gauge and spin. I stuck with single plies as I had plenty of oddments of these yarns, but also because the ply can effect the way the yarn felts, and single ply non-superwash yarns felt *really* well.
You can off course use plied yarns or double up yarns if that's what you have. Chunky yarns meant these knitted up really quickly.
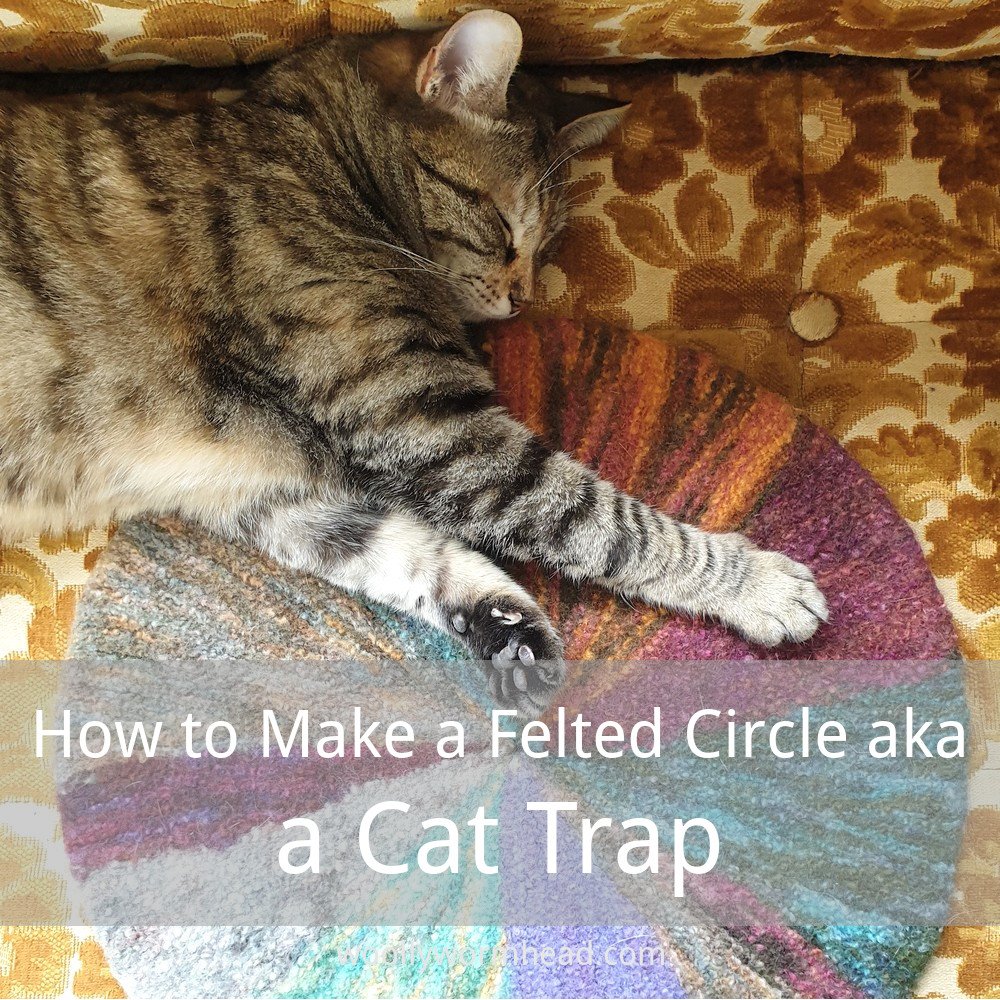
These would be fantastic with Malabrigo Merino Worsted leftovers, and I have made a circle with some of mine. It felted really well but it isn't as thick and as robust as these, so that's something else to factor - what will your circles be used for afterwards? I'm planning to use the Mal Worsted ones as place mats for the table or for putting my heavy Hat stands on - wool is incredibly durable. But I do think the heavier yarns are better for cat traps... and having seen how Mina likes to sleep on hers and kill it in equal measure, I'm glad I used what I did!
Do try and keep the yarns you choose as close in gauge and yarn type as possible - even though I was very careful with mine, one or two of the yarns that would generally be knit at the same gauge but maybe looked a little finer to the eye came out a little smaller after felting, and those sections kinda dip in by a very small amount around the edge. This may not bother you at all, but I do like to aim for perfect circles hence I mention it, in case you're like me.
For the two circles shown, I used around 200g of oddments each. I'll talk more about finished measurements in a moment, but these were between 21in and 22in in diameter before felting, roughly 16in diameter after felting. That's 53cm to 56cm diameter before felting, 40 to 41cm afterwards.

Calculating how many stitches to cast-on
Before I say any more, I will say that yes, I did use a provisional cast-on and then graft these! Because I like things smooth and even and I love grafting. But it's not just that - if you sew a seam in any other way it may felt differently to the rest of the knitting. I also didn't want the start and end to be obvious. These are going to be felted, if your graft isn't quite perfect it won't notice; these are an ideal project to practice with. And while I'm talking about techniques, I'll always recommend German short rows for sideways garter patterns - they're super quick and so much easier to graft than any other short row method.
You'll want to calculate your gauge based on knitting with these yarns at a needle size or two larger than you normally would. A loosely knit circle will felt more quickly than a tight knit one. I knit the 2nd circle on not quite such large needles and it needed 2 runs through the machine, whereas the first one was done and dusted in one go.
The number of stitches you cast on will be your radius, and that measurement will be doubled when calculating your finished size. How much the yarn felts isn't an exact science, but I've found that in general for me, the diameter shrank by around 25%.
So for example if you'd like to make a felted circle of around 12in or 30cm diameter, aim for a pre-felting diameter of 16in or 40cm, and a radius of 8in or 20cm.
Now, there is a formula to the number of stitches you cast on. Remember how I said that an 18, or in this case 19, panel circle will have every 3rd stitch short rowed? The formula is based on a multiple of 3 but it isn't just a multiple of 3.
If we go with a multiple of 3 and start by short rowing the 1st stitch then the 4th, 7th and so on, we will end up with 2 stitches at the perimeter that can't be short rowed. We can't short row the very last stitch, that's our selvedge stitch, so I suggest casting on a multiple of 3 less one. A multiple of 3 less one means we keep that selvedge stitch but we do away with that other excess stitch which could make the edge of our felted circle not quite flat.
In my examples, the first circle was knit with a cast-on of 38 stitches, the 2nd with 41.
Your short row sequence would then go as follows:
Provisionally cast-on multiple of 3 less 1.
Row 1 (WS): knit to end
Row 2: (RS): knit to one stitch from the end, short row the end stitch
Row 3: knit to end
Row 4: knit to 3sts before the last short rowed stitch, short row the next stitch.
Repeat Rows 3 and 4 over and over until you have one stitch left on the needle after working the last short row. Turn and knit that last stitch to take your yarn back to the outside selvedge (the edge where you first short rowed will become the centre of your circle). The final row will have you work across the short rows to close the panel. On the very final panel, this final row will be replaced by the graft.
Simply do this for 19 panels, don't knit the very last closing row on panel no.19, graft and then you're done! Once you've grafted you'll want to close the centre circle if you don't want a small hole at the centre after felting, and I've a tutorial for drawing through on a sideways knit Hat that'll do the trick.

Joining in new yarns
I'm going to suggest spit-splicing whenever you join a new yarn - it makes the most of your yardage and saves you having to weave in so many ends.
As we know I'm a bit particular about things, and I wanted to keep changes in yarns and therefore colour to the outside selvedge edge. I'd knit to the end in the colour I wanted to finish, break the yarn, then tink back a few stitches. With that short yarn end I'd spit-splice the new yarn and colour, knit to the end and turn. I soon got the hang of when I could join a new yarn without knitting then tinking.
Working this way also meant that those ridges in garter where we change colour were all on the same side. This may not bother you, and you may find that trying to change the yarns on the same side of the knitting is a bit wasteful, just not possible, or that mixing it up simply adds to the fun. Changing yarns mid-panel is really good fun as it then breaks up the visual appearance of the structure and makes it feel more painterly after felting.
When I work in garter stitch like this I don't use a slipped stitch selvedge and I really don't see the point if it's going to be felted. Instead I knit to the end, but invariably knit the last stitch through the back of the loop. I then slip the first stitch of the next row purlwise. I've a very loose and fast knitting style, an English thrower style, so for me knitting the last stitch twisted then slipping it at the beginning of the next row gives me a really nice edge. Treat this outside selvedge edge as you normally would, bearing in mind that any particular stitch details won't notice after felting, but providing a good structure will be of benefit.
Felting and finishing
Weave in any ends. Try and weave them into the knitting of the same colour, as they may show after felting should they contrast in any way.
These can go straight in the washing machine with the rest of your laundry that's of similar colours. It needs a warmish wash, as wool needs both heat and agitation to felt. If it doesn't come out quite as tight as you'd like, simply put them through another wash.
They may require a little smoothing out as they dry, and this is a good time to even out your edges should some of your yarns have behaved differently to others. If you closed the centre of the circle that can be squashed flat fairly easily if it still feels a little lumpy. You won't be able to stretch or even out the edges that much, but you can encourage the shape a little.
Dry them flat and you're done. Enjoy!
I'd love to see what you make, there's a wonderful freedom in making something that isn't going to be perfect! Although I rather got into creating patterns that would work across the 19 panels 'cos that's how I roll.... once this post is live on the main blog and I've written the other tutorials and articles that I'm currently neglecting, I'll explain the variations on these that I've been making, and how I managed to fit some sequencing in whilst still staying true to the maths of 19. I'm currently making a set of place mats that are all co-ordinated yet all different :D
Alternative cast on formulae
If you've made sideways garter stitch circles before and prefer not to short row the very last stitch, i.e. the stitch at the edge of what will be the centre of the circle, then I've a formula for you, too.
If you cast on a multiple of 3 plus one then you can short row stitches no. 3, 6, 9 and so on and still end up with only one selvedge stitch. So you'd go with 40 or 43 stitches instead of 48 or 41. On the first row you'd go to 3 stitches from the edge and short row the next stitch and so on.
Not short rowing the very last stitch isn't something I recommend for a sideways knit Hat, as it results in what I call 'teat-head'. It's the equivalent to working a vertically knit Hat, doing all the decreases for the crown, then working several plan rounds before drawing through to close. It won't lay flat and look a little unsightly. However, it could work here with of so many panels, depending on the weight of your yarn. I wouldn't do it, but there's the option should you want to.
Heck, if you forget the maths or are unsure, you can cast on a multiple of 3 and then short row the 2nd stitch from the end, then every 3rd stitch after that - i.e. stitches 2, 5, 8 and so on will be short rowed, to still always end with only one selvedge stitch after the last short row. But I find that messier and harder to remember - it's easiest to cast on a multiple of 3 less 1 then always short row the last stitch and every 3rd after that.
OK, I think I've talked sideways garter circles at you for long enough. Fire away if you've any questions!


