

Description
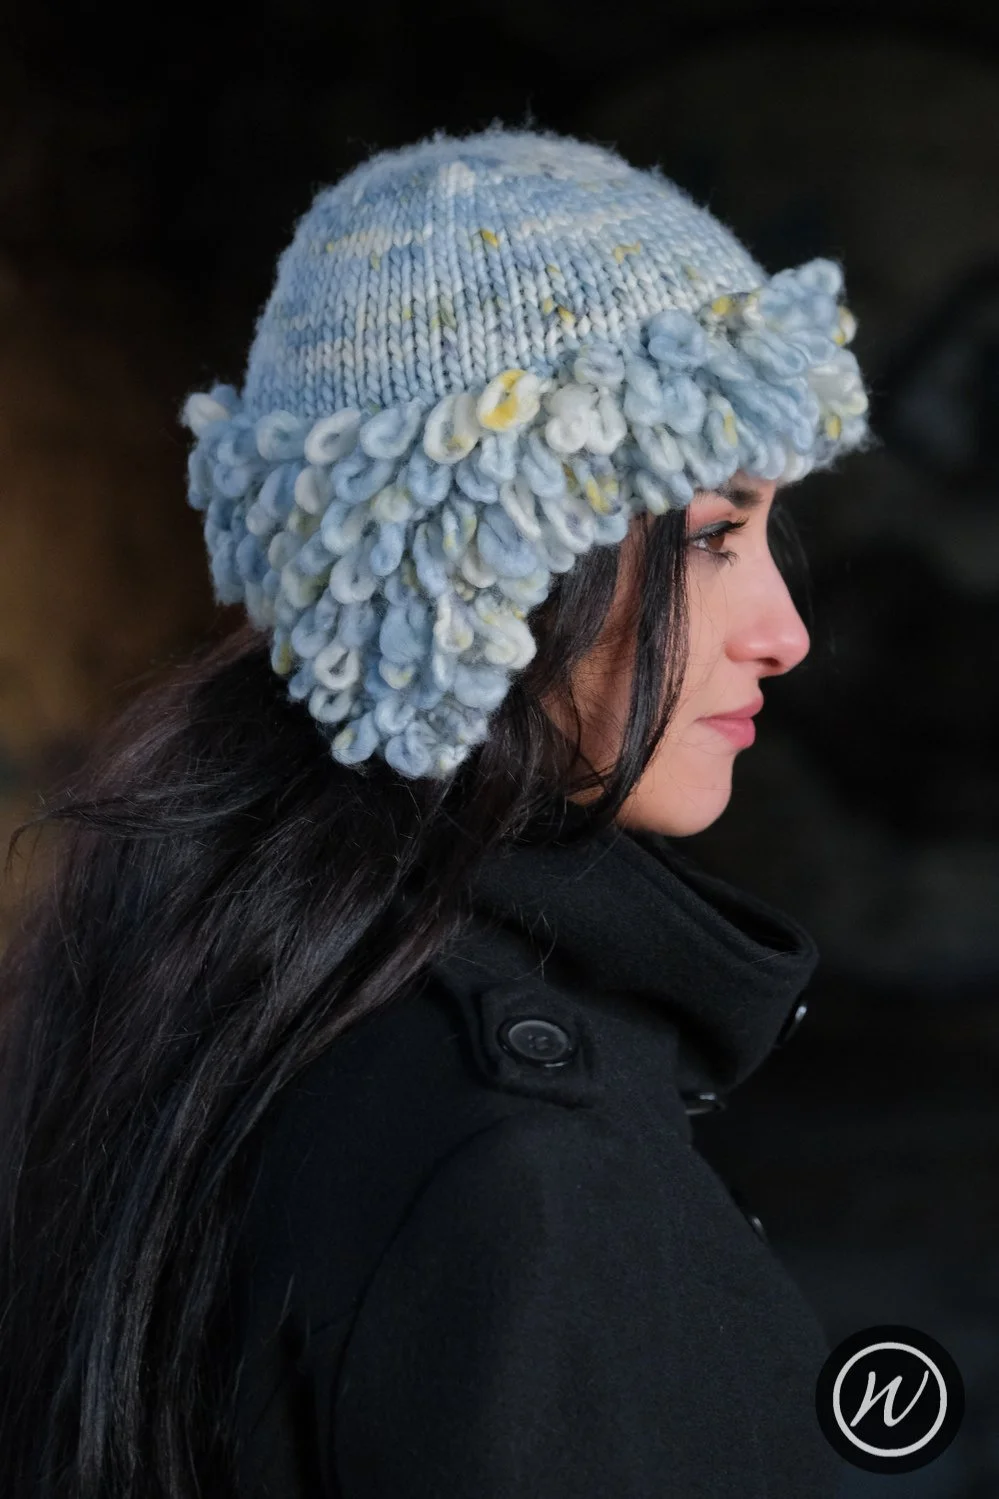
Loopy Flapper features a wide warm band and cosy earflaps, and a fitted crown. The loop, or fur, stitch provides visual texture and an extra layer of warmth.
Availability
My Patreon supporters and members of The Woolly Hat Society get exclusive early access to new free patterns and tutorials. Once the exclusive period is over it’s published here on the blog.
Support
If you have a question about this pattern, pop it in a comment below. Sorry, but I’m unable to help with my free patterns or tutorials via email or private messages.
Social Media
Share your hand-knit Hats online with these hashtags!
#WWLoopyFlapperHat
Yarn
150g/114yd/104m
Bulky weight, single ply yarn
Needles & Notions
Set 7mm/UK2/US-- DPNs/Circular or size needed to obtain gauge
Stitch marker as necessary
Tapestry needle
Sample details
Shown in Manos Del Uruguay Franca [114yd/104m per 150g; 100% Merino]
Shown in size 22in/55.75cm on model with 21in/53.25cm circumference head
Gauge
12 sts to 4in/10cm on 7mm needles over Stocking St.
Sizes
To fit size: 18 [20, 22] in/45.75 [50.75, 56] cm
Finished size: 16 [18, 20] in/40.75 [45.75, 50.75] cm
Not sure which size to make? Check my handy size and measuring guide!
Skills required
Stocking Stitch
Knitting in the round
Abbreviations
K: knit
P: purl
rpt: repeat
R/rnd(s): rounds
st(s): stitch(es)
M1: lift the horizontal loop between next 2 sts, place it onto the left needle & knit into the back of it
k2tog: knit next 2sts together
ssk: slip next 2 sts knitwise, then knit these 2 sts together through the backs of the loops
p3tog: purl next 3sts together
ML: Make Loop - K1 through back of loop, keeping st on left needle bring yarn forward, pass yarn over left thumb to make a loop (approx 4cm), take yarn back and knit this st again through back of loop, slipping st off needle and pass 1st made on the right needle over this 2nd stitch.
How to
Using Circular Cast-on method, cast on 6sts.
Foundation Rnd: Knit into the front and back of each stitch [12 sts]
Join in the round, being careful not to twist sts. Place stitch marker to indicate start of round.
Crown
Rnd 1: *K2, M1; rpt from * to end [18sts]
Rnd 2: *K3, M1; rpt from * to end [24sts]
Rnd 3: *K4, M1; rpt from * to end [30sts]
Continue in this manner, increasing 6sts per round, until you have 48 [54, 60] sts
Body
Now work plain stocking stitch by knitting every round until work measures 2.5 [3, 3.5] in/6.25 [7.5, 9] cm from the last increase round.
Brim
Rnd 1: *K1, ML rep from * to end
Rnd 2: Knit all stitches
Rnd 3: *ML, K1; rep from * to end
Rnd 4: Knit all stitches
Repeat these 4 rounds until work measures approx. 4.5 [5.25, 6] in/11.5 [13.25, 15.25] cm from the last increase round, ending after either a Rnd 1 or Rnd 3.
Note: knitting through the back of the loop after working the loop stitches can help neaten and tighten them up should it be needed.
Earflaps
If the Body ended after a Rnd 1, work Earflap round as follows:
Earflap Rnd: Bind off 5sts, K 9 [11, 13] (1st earflap), bind off 19 [21, 23] sts, K 9 [11, 13] (2nd earflap), bind off 6sts; break yarn
If the Body ended after a Rnd 3, work Earflap round as follows:
Earflap Rnd: Bind off 6sts, K 9 [11, 13] (1st earflap), bind off 19 [21, 23] sts, K 9 [11, 13] (2nd earflap), bind off 5sts; break yarn
With right side facing, rejoin yarn to 1st earflap and work as follows:
Row 1 (RS): *K1, ML; repeat from * to last stitch, K1
Row 2 (WS): Purl all sts
Row 3: k2tog, *ML, K1; repeat from * to last 3sts, ML, ssk
Row 4: Purl all sts
Repeat Rows 3 & 4 until 3sts remain, ending after a Row 3
Row 5: p3tog
Break yarn draw through remaining stitch and tighten to close.
With RS facing rejoin yarn to 2nd earflap and work to match.
Finishing
Gently tug all loops to tighten the knots. With left over yarn, sew a few loops at the crown for added decoration as desired.
Weave in all ends. A gentle wash and blocking is recommended to help the shaping settle and lay flat.


This is a really rather old pattern of mine, originally published in 2006. It got parked a long time back with the intention of it going into a different project and possibly transferring the copyright, and that never happened. So here it is now, updated and available for free for all!


